October 02, 2011

Red Velvet Cake with Cream Cheese Frosting

Red Velvet cake is one of those desserts I only care for when its been homemade. There's just something about store bought ones that's off, like you can taste the red dye in the batter, giving it a strange flavor. The recipe below is one I found in a neat old cookbook, 300 Years of Carolina Cooking, it has similar properties like my Grandmothers so I thought I'd give it a go.

For The Cake
Ingredients: 1 Stick Butter (softened)
1/2 Cup Crisco
1 1/2 Cups Sugar
2 Eggs
1 1/2 Bottles Red Food Coloring
2 Tbls. Cocoa
1 tsp. Soda
Pinch of Salt
2 1/2 Cups Flour
1 tsp. Vanilla
1 Cup Buttermilk
1 Tbls. Vinegar

In a large bowl, cream together the Butter

Shortening

Sugar

And Eggs 

In a separate bowl, mix the Cocoa

And Food Coloring making a paste

Blend with the Butter

Add the pinch of Salt

Vanilla

Buttermilk

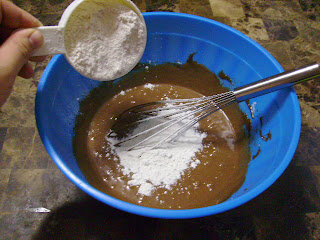
And Flour mixing thoroughly

Mix in the Soda

Then the Vinegar

Pour the Batter into two Greased and Floured pans and bake at 350F for 25-30 minutes (or until a toothpick inserted in the middle comes out clean)

For The Frosting
Ingredients: 1 Stick Butter (softened)
2 (8oz.) Packages Cream Cheese (room temperature)
1 tsp. Vanilla
2 Cups Powdered Sugar

In a large bowl cream together the Butter

And Cream Cheese

Add the Vanilla

Then the Sugar (one cup at a time) mixing thoroughly.

Wait until the Cakes cool to room temperature before frosting. 

Then decorate, cut, and serve

This cake is very moist and has a wonderful flavor with a slight cocoa taste on the palate. The color is a deep rich red that looks good with simple Cream Cheese frosting or by itself. The frosting is light with a strong Cream Cheese flavor, but doesn't over power the cake.

 It wasn't until I uploaded the pictures that I realized there weren't any of the cooled cakes or of it being frosted, I apologize. 

September 29, 2011

Sourdough Sponge Starter

Recently while scanning the many useless cookbooks on the shelves of the local library, I happened upon a copy of The Complete Book of Breads by Bernard Clayton, JR. After reading through a few pages, I realized how much more potential this hands on recipe book had to offer than those of today that rely on all sorts of machinery to do the heavy mixing. After checking it out and heading home, I began reading about all the outdated techniques and tips that have been lost throughout the years of Bread making. Below is just one of the many different Sponge Starter recipes listed inside that I'll be using in future Bread posts.

Ingredients: 1 Package Dry Yeast
1 3/4 Cups All-Purpose Flour
1 Tbls. Salt
1 Tbls. Sugar
2 1/2 Cups Hot Tap Water (120F-130F)

In a medium bowl, combine together the Yeast

Flour

Sugar

And Salt, whisk thoroughly

Pour in the warm Water and stir for thirty seconds

Cover the bowl with plastic wrap and leave in a warm area (80F-85F) for 4-5 days (scrape down the mixture daily)

After the Sponge is finished fermenting, I'll be using it to bake Sour Dough loaves.

September 28, 2011

Hershey's Syrup Brownies

I found this recipe on the back of the Hershey's Syrup can label. I'm usually not a big fan of Brownies, but these sounded delicious.

Ingredients: 1 Stick Butter (softened)
1 Cup Sugar
1 1/2 Cups Hershey Syrup (16 oz. can)
4 Eggs
1 1/4 Cups All-Purpose Flour
1 Cup Chocolate Chips

In a large bowl, cream together the Butter

And Sugar

Add the Hershey's Syrup

Eggs (one at a time)

And Flour mixing thoroughly

Stir in the Chocolate Chips

Pour the Batter into a 13x9x2 in. pan (I used two 6x2 in. pans instead)

Spread the Batter evenly then bake in a preheated oven at 350F for twenty to thirty minutes or until the Brownies pull away from the sides

Remove from the oven and cool thoroughly

Cut into bars and serve

These Brownies have a wonderful chocolate flavor and soft texture, but are a bit too cakey for my liking. Hopefully they get a little more gooey after sitting overnight. Still, they have a great taste and would be good with vanilla ice cream.

September 24, 2011

Pane Al Cioccolato

A slightly sweet Italian bread, I've read this recipe several times in my Best Ever Book of Breads, but haven't had all of the ingredients to make it until now. 

Ingredients: 3 Cups Unbleached White Bread Flour
1 1/2 Tbls. Cocoa Powder (Unsweetened)
1/2 tsp. Salt
2 Tbls. Sugar
1/2 oz. Fresh Yeast 
1 Cup Water (lukewarm)
2 Tbls. Butter (softened)
3 oz. Plain Continental Chocolate (coarsely chopped)
(Extra Butter for brushing)

In a large bowl, combine the Flour

Cocoa

And Salt, mixing thoroughly

Stir in the Sugar and make a well in the center

In a separate cup, cream together the Yeast

And four Tbls. warm Water

Then stir in the rest of the Water

Pour the Yeast mixture into the Flour

Mixing gradually until a Dough forms

Knead the softened Butter into the Dough

Then knead on a lightly Floured surface until smooth and elastic

Place the Dough into a lightly Oiled bowl, cover with plastic wrap and leave to rise for one hour (or until doubled in size)

Punch down the Dough

Then turn out onto a lightly Floured surface

Gently knead in the Chocolate pieces

Roll into a ball and let rest five minutes

Shape the Dough into a round and place into a lightly Oiled pan until doubled in size (about forty five minutes)

Once the Dough has reached the top of the pan, place into a preheated oven at 425F for ten minutes, then reduce the temperature to 375F and continue baking an extra twenty five to thirty minutes

Remove the Bread from the oven and brush with melted Butter, then let cool thoroughly 

Once cool, slice and enjoy

When the Bread was removed from the oven the top was very hard, I worried it had been overcooked. Luckily after brushing with the Butter and leaving to cool, it softened back up (as I knew it would) so no need to worry if yours comes out the same way. The flavor is light, not to overbearingly sweet, just enough to give a hint of Chocolate on the palate. The Bread is super soft and would be good covered in Honey, Butter, extra Chocolate sauce, or anything your mind can think of.